BE-IIS-HPP-CAN-FD-SIC
An isolated CAN-FD HAT++ for Raspberry Pi systems requiring robust, high-speed CAN communication.
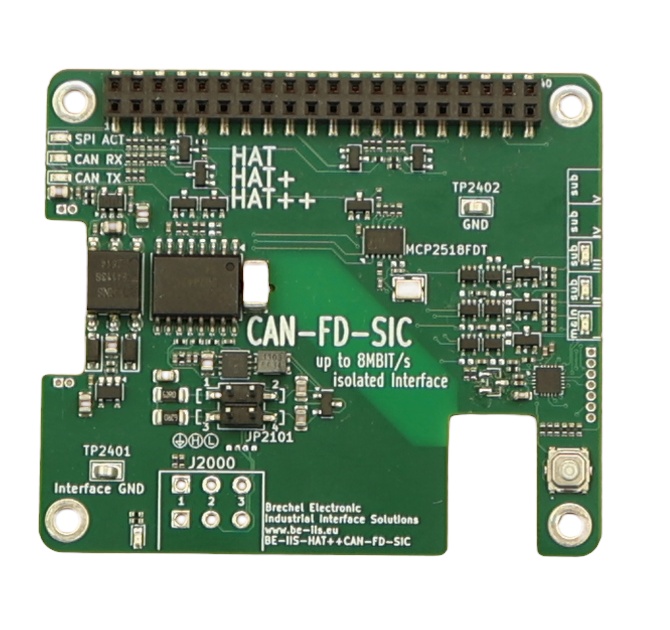
Overview
The BE-IIS-HPP-CAN-FD-SIC provides a galvanically isolated CAN-FD interface with Signal Improvement Capability. It is intended for automotive, industrial and laboratory CAN networks with data rates up to 8 Mbit/s.
The HAT is part of the stackable HAT++ ecosystem and uses a defined hardware instance for SPI and interrupt assignment.
Linux integration
The board uses the Linux MCP251xFD driver family. The BE-IIS installer includes the relevant kernel-module build support and product-specific Device Tree overlays.
After the overlay is active, the CAN controller is available through the standard SocketCAN subsystem. Use normal Linux CAN tools and applications rather than a vendor-specific API.
Typical operation
Bring the CAN interface up with the selected nominal and data bit rates, then use tools such as ip link, candump, cansend or a SocketCAN application.
The physical network must have correct bus termination. CAN-FD timing must match all participating nodes.
Integration notes
Choose a unique HAT++ instance before installation. The selected overlay maps the controller to the correct SPI chip select and interrupt GPIO. Do not use the same SPI instance for a second board in the same stack.
CAN-FD example
The product scripts contain predefined CAN and CAN-FD timing configurations. This example configures the default interface and starts the included transmit performance test.
cd ~/be-iis-installer/products/BE-IIS-HPP-CAN-FD-SIC-REVB
./scripts/config_7M_can.sh beiis-can0
./scripts/canperf.py tx -i beiis-can0 --size 64 --time 10
On the receiving node, use:
./scripts/canperf.py rx -i beiis-can0
CAN over 10BASE-T1S example
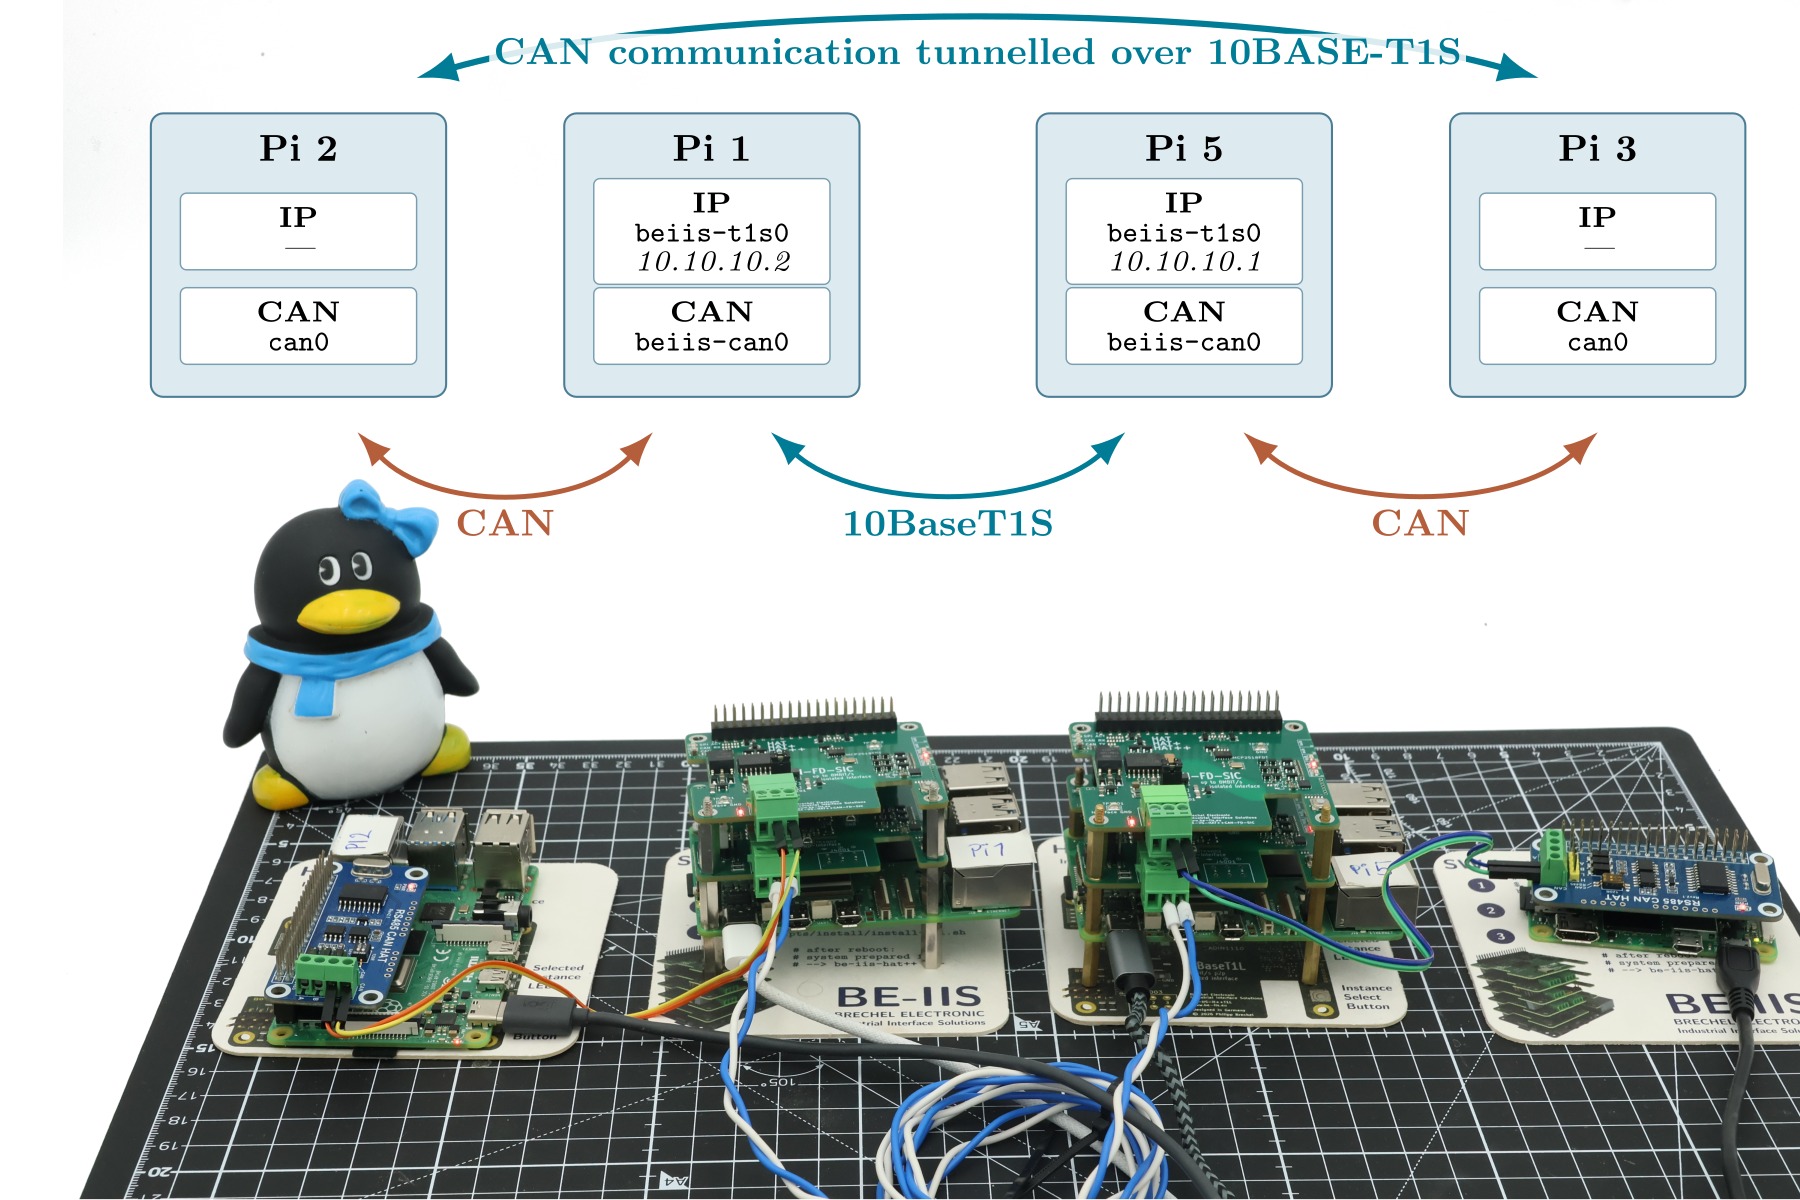
The CAN TCP bridge is the application example for transporting this HAT’s SocketCAN traffic over a T1S Ethernet link. First configure beiis-can0 and the T1S network on both gateways. Then run:
cd ~/be-iis-installer/examples/can-gateway/can-tcp-bridge
./can_tcp_bridge.py 10.10.10.2 beiis-can0    # first gateway
./can_tcp_bridge.py 10.10.10.1 beiis-can0    # second gateway
The two commands belong on separate Raspberry Pis. TCP port 29536 is used by default.
Source: CAN TCP Bridge example.