GMSL2 Camera Systems
Remote CSI-2 camera integration for Raspberry Pi through GMSL2 coaxial links.
Overview
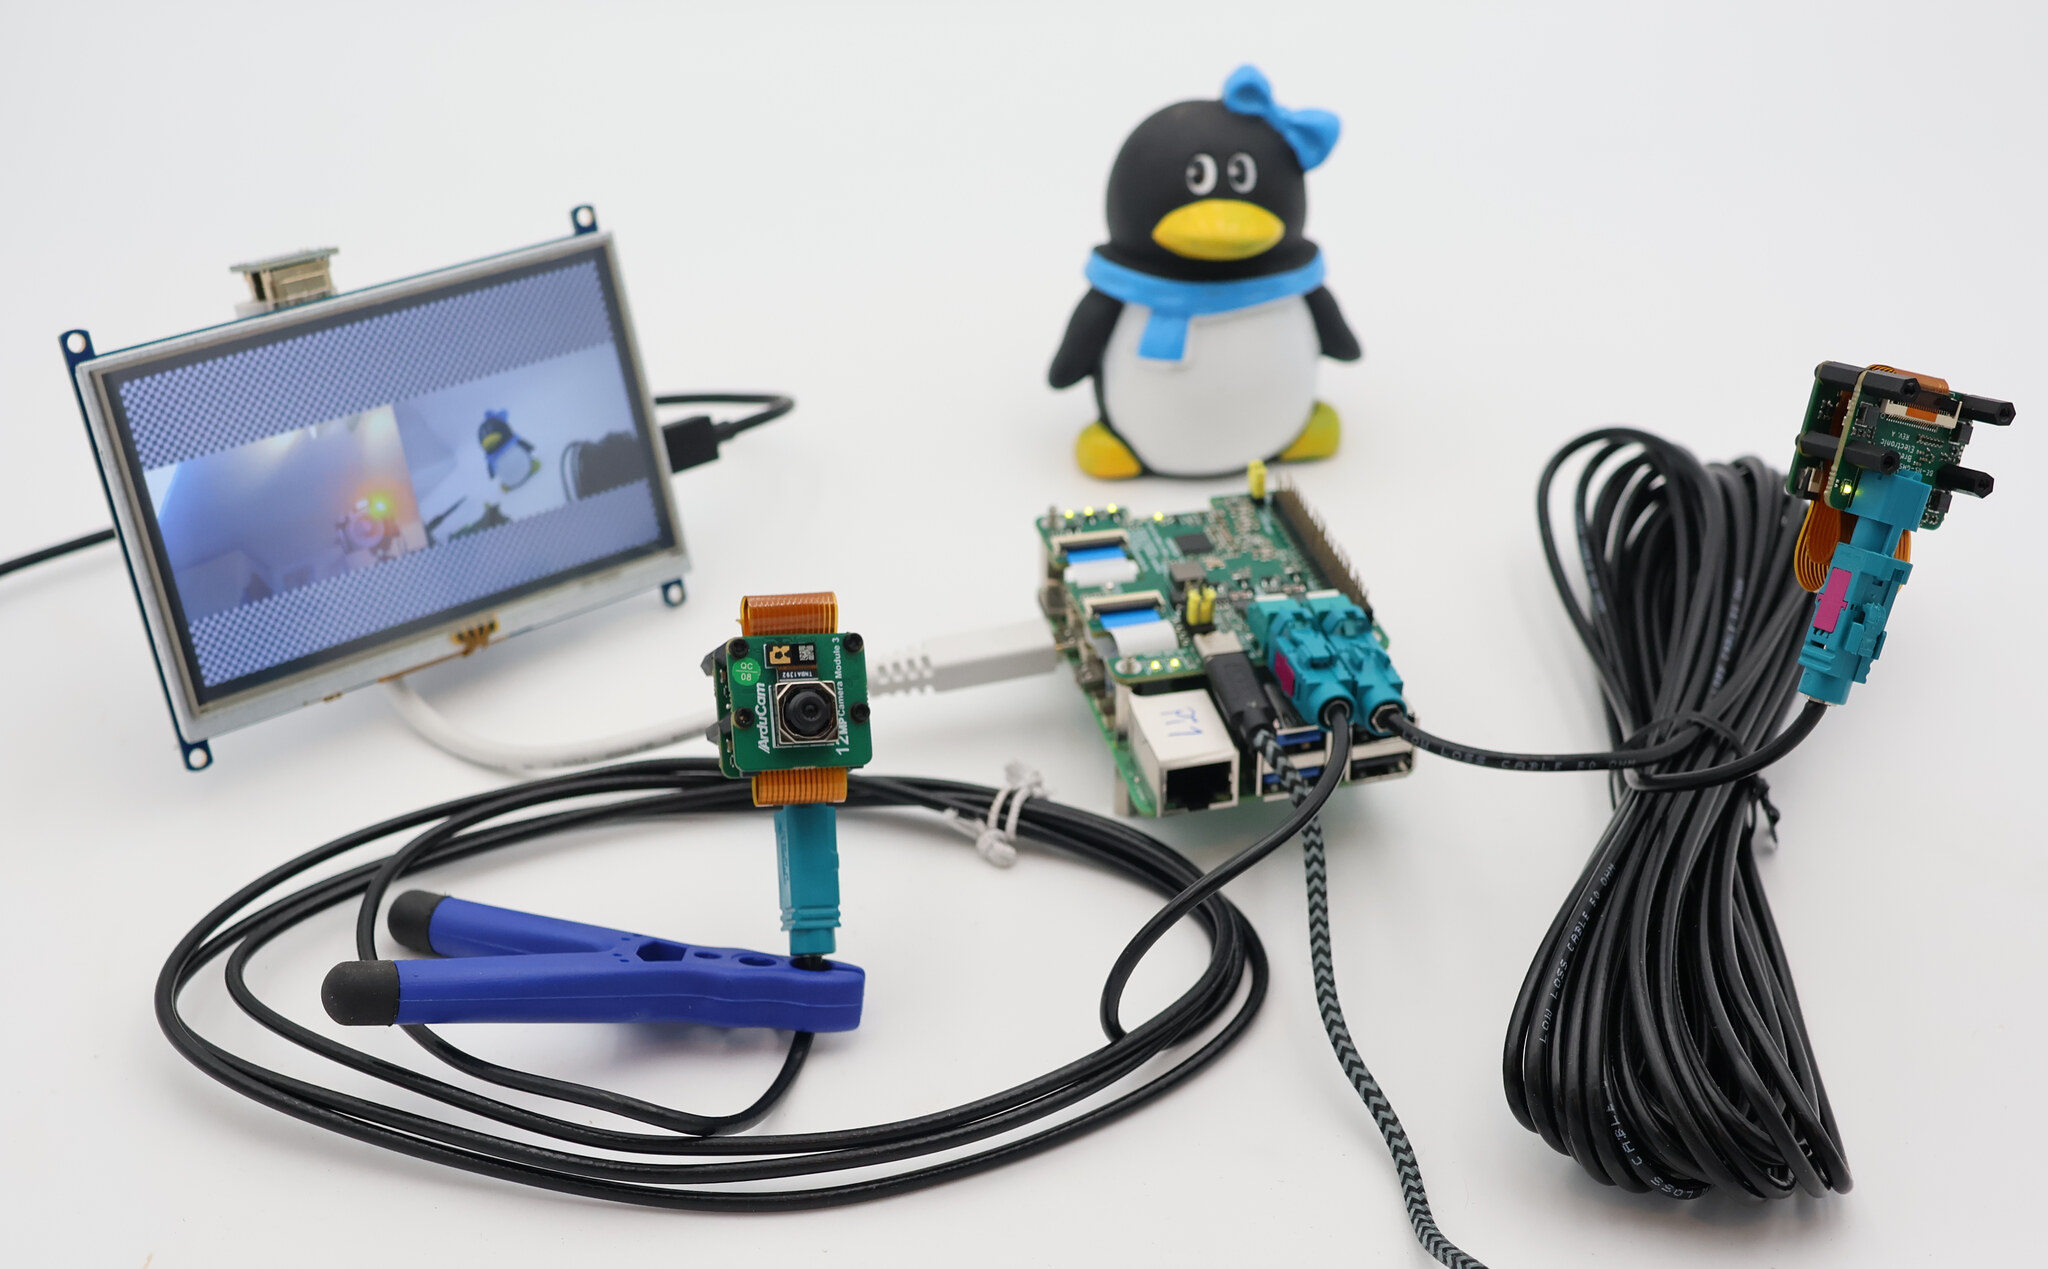
BE-IIS GMSL2 camera hardware moves a CSI-2 camera away from the Raspberry Pi processor and carries the video stream over a single automotive coaxial cable. This is useful where the image sensor must be placed remotely, where a flexible wiring harness is needed or where two synchronized camera positions are required.
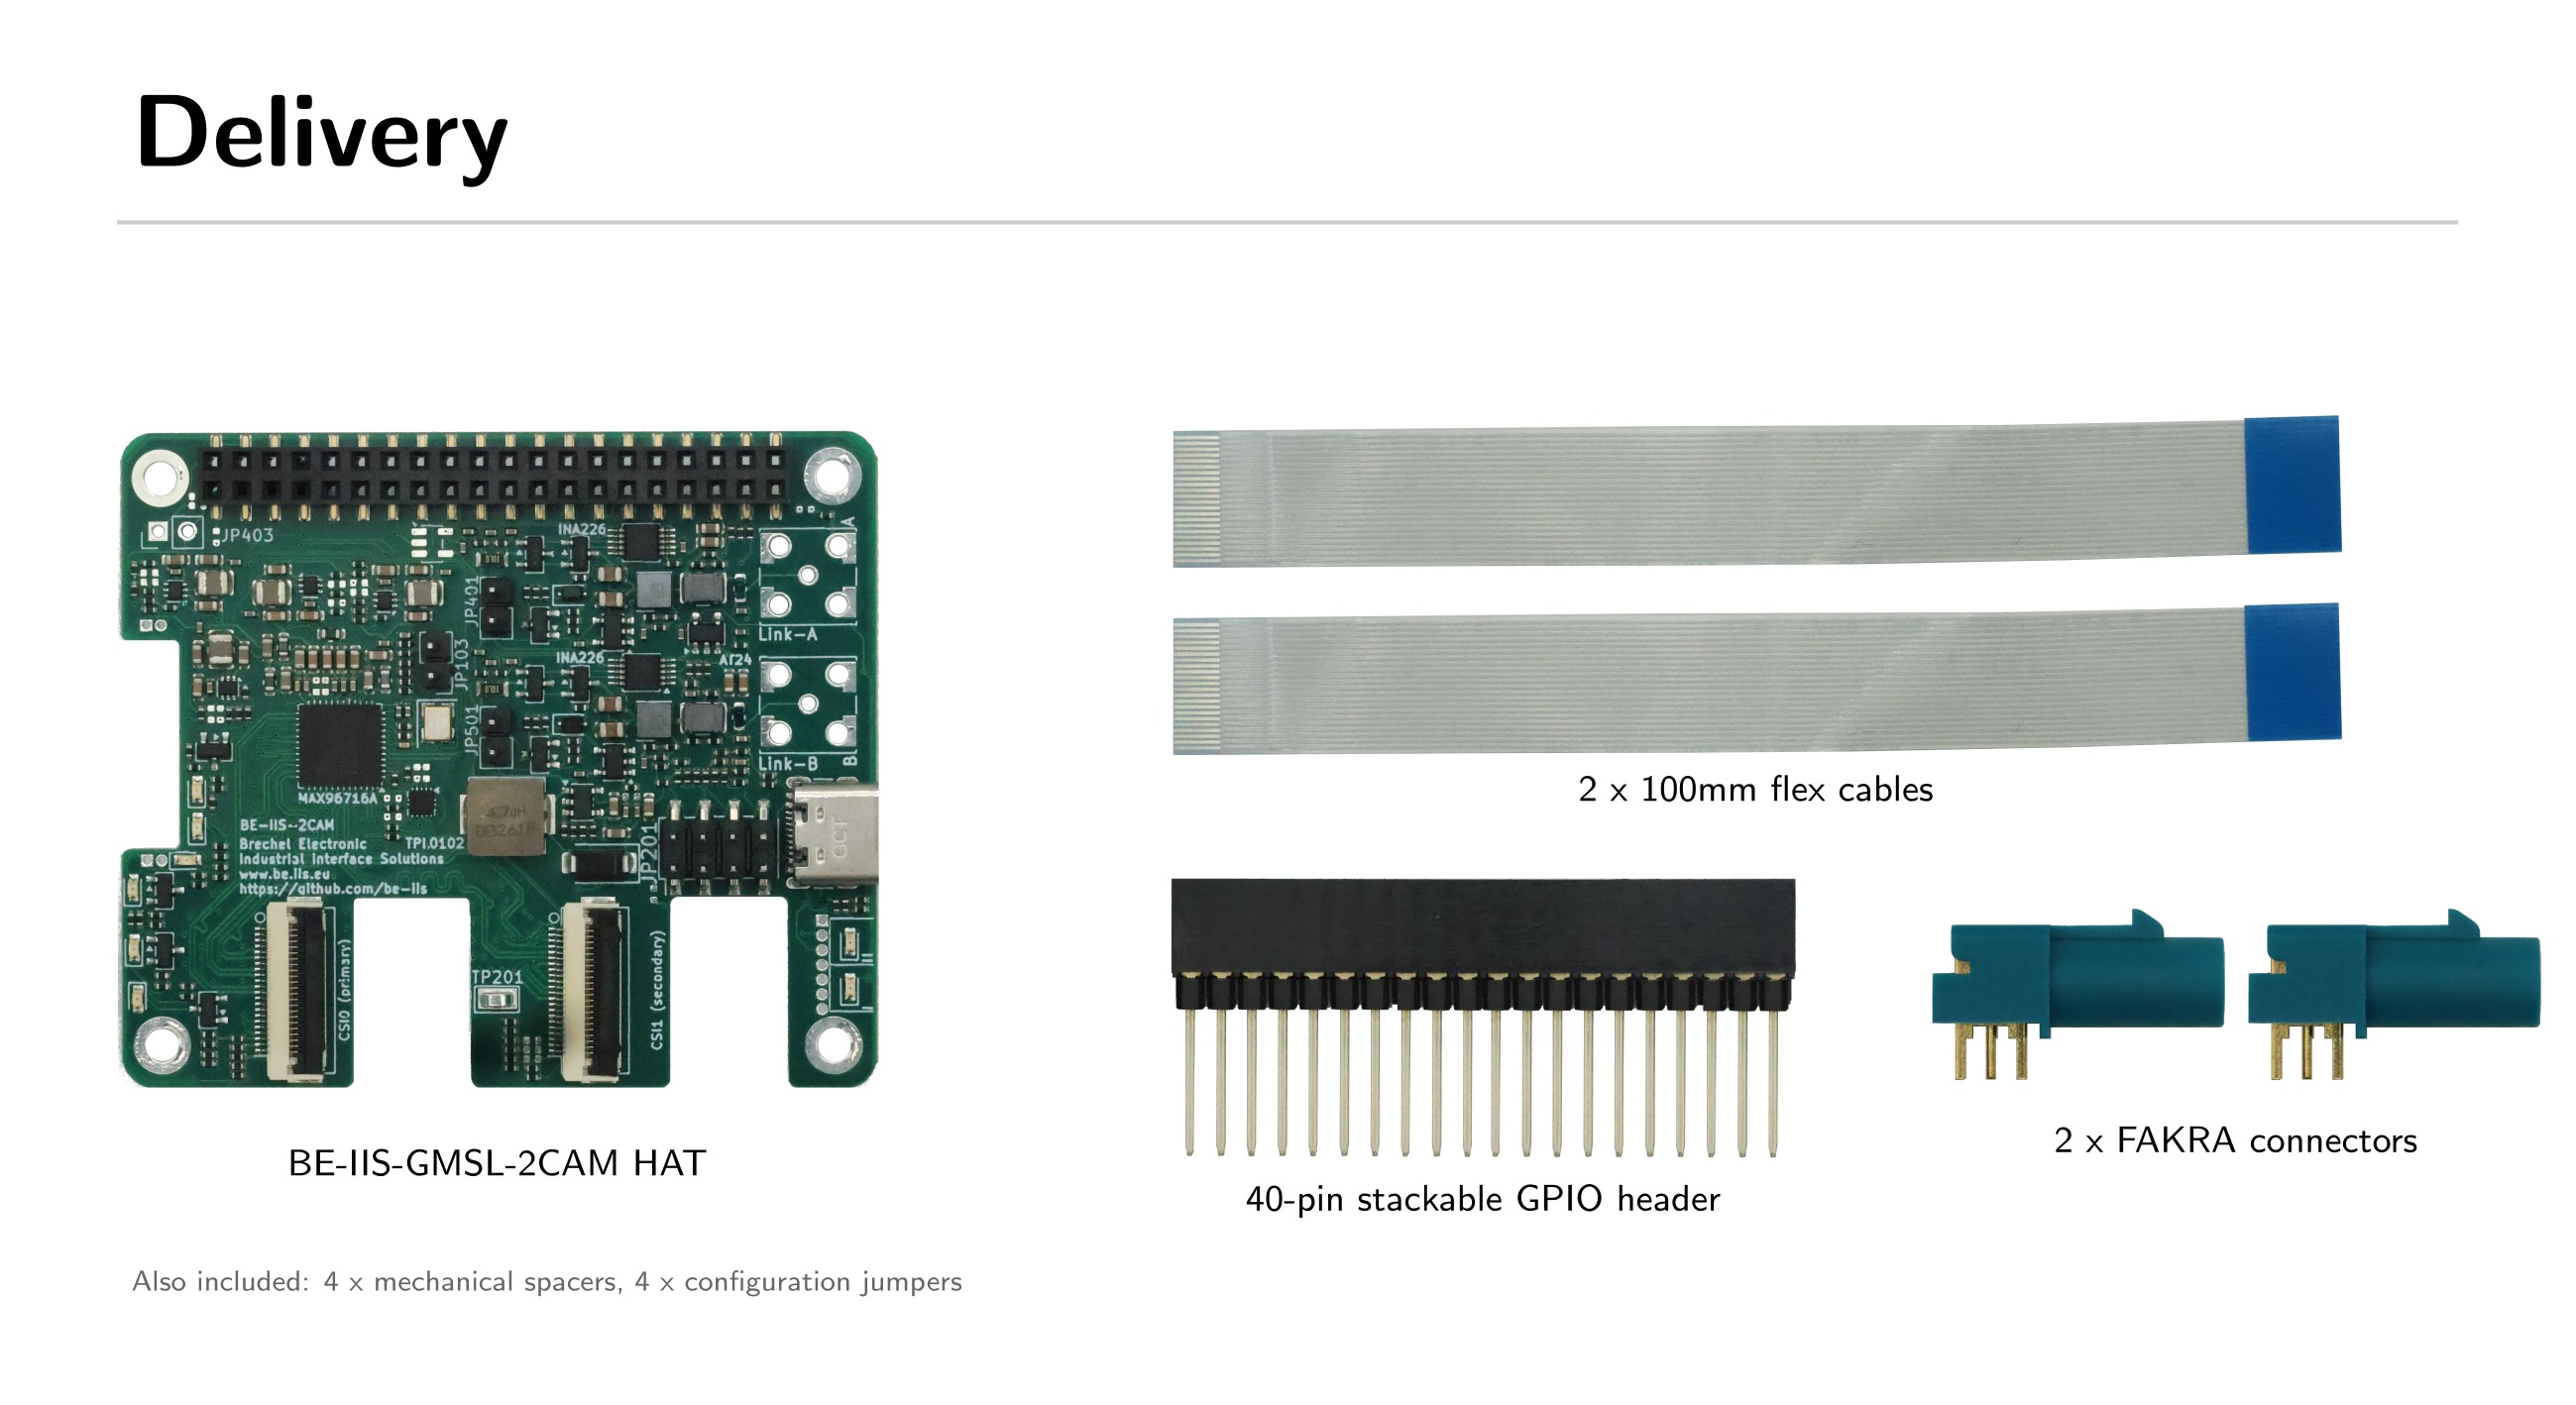
The system consists of a Raspberry Pi side deserializer HAT and one serializer board per remote camera.
Camera system gallery
The four images above show the complete camera system. Select a small image to move it into the large position; use the magnifier to enlarge any image.
The gallery shows systems with a 3 m coaxial link and a 10 m coaxial link. Both links operated reliably during the demonstration, without visible image dropouts or link loss.
No kernel build required
The demonstrated camera link works with the standard Raspberry Pi camera software; no custom kernel build and no special camera kernel are required. The external GMSL2 serializer and deserializer are configured from Linux through the normal I²C tools and the open BE-IIS camera installer.
This keeps the link bring-up transparent: configure the GMSL2 devices over I²C, then use the usual rpicam applications for preview and capture.
Camera flexibility and demonstrated system
The demonstration was recorded with Sony IMX708 cameras. It shows that Raspberry Pi CSI-2 cameras can be transported over a GMSL2 coaxial link with a straightforward configuration flow.
The IMX708 is a proven example, not a restriction. Other Raspberry Pi camera modules can also be used when their CSI-2 format, lane configuration and Linux camera driver are supported by the Raspberry Pi system. The host side can be a Raspberry Pi or another SBC with a compatible CSI-2 camera input and suitable Linux camera support.
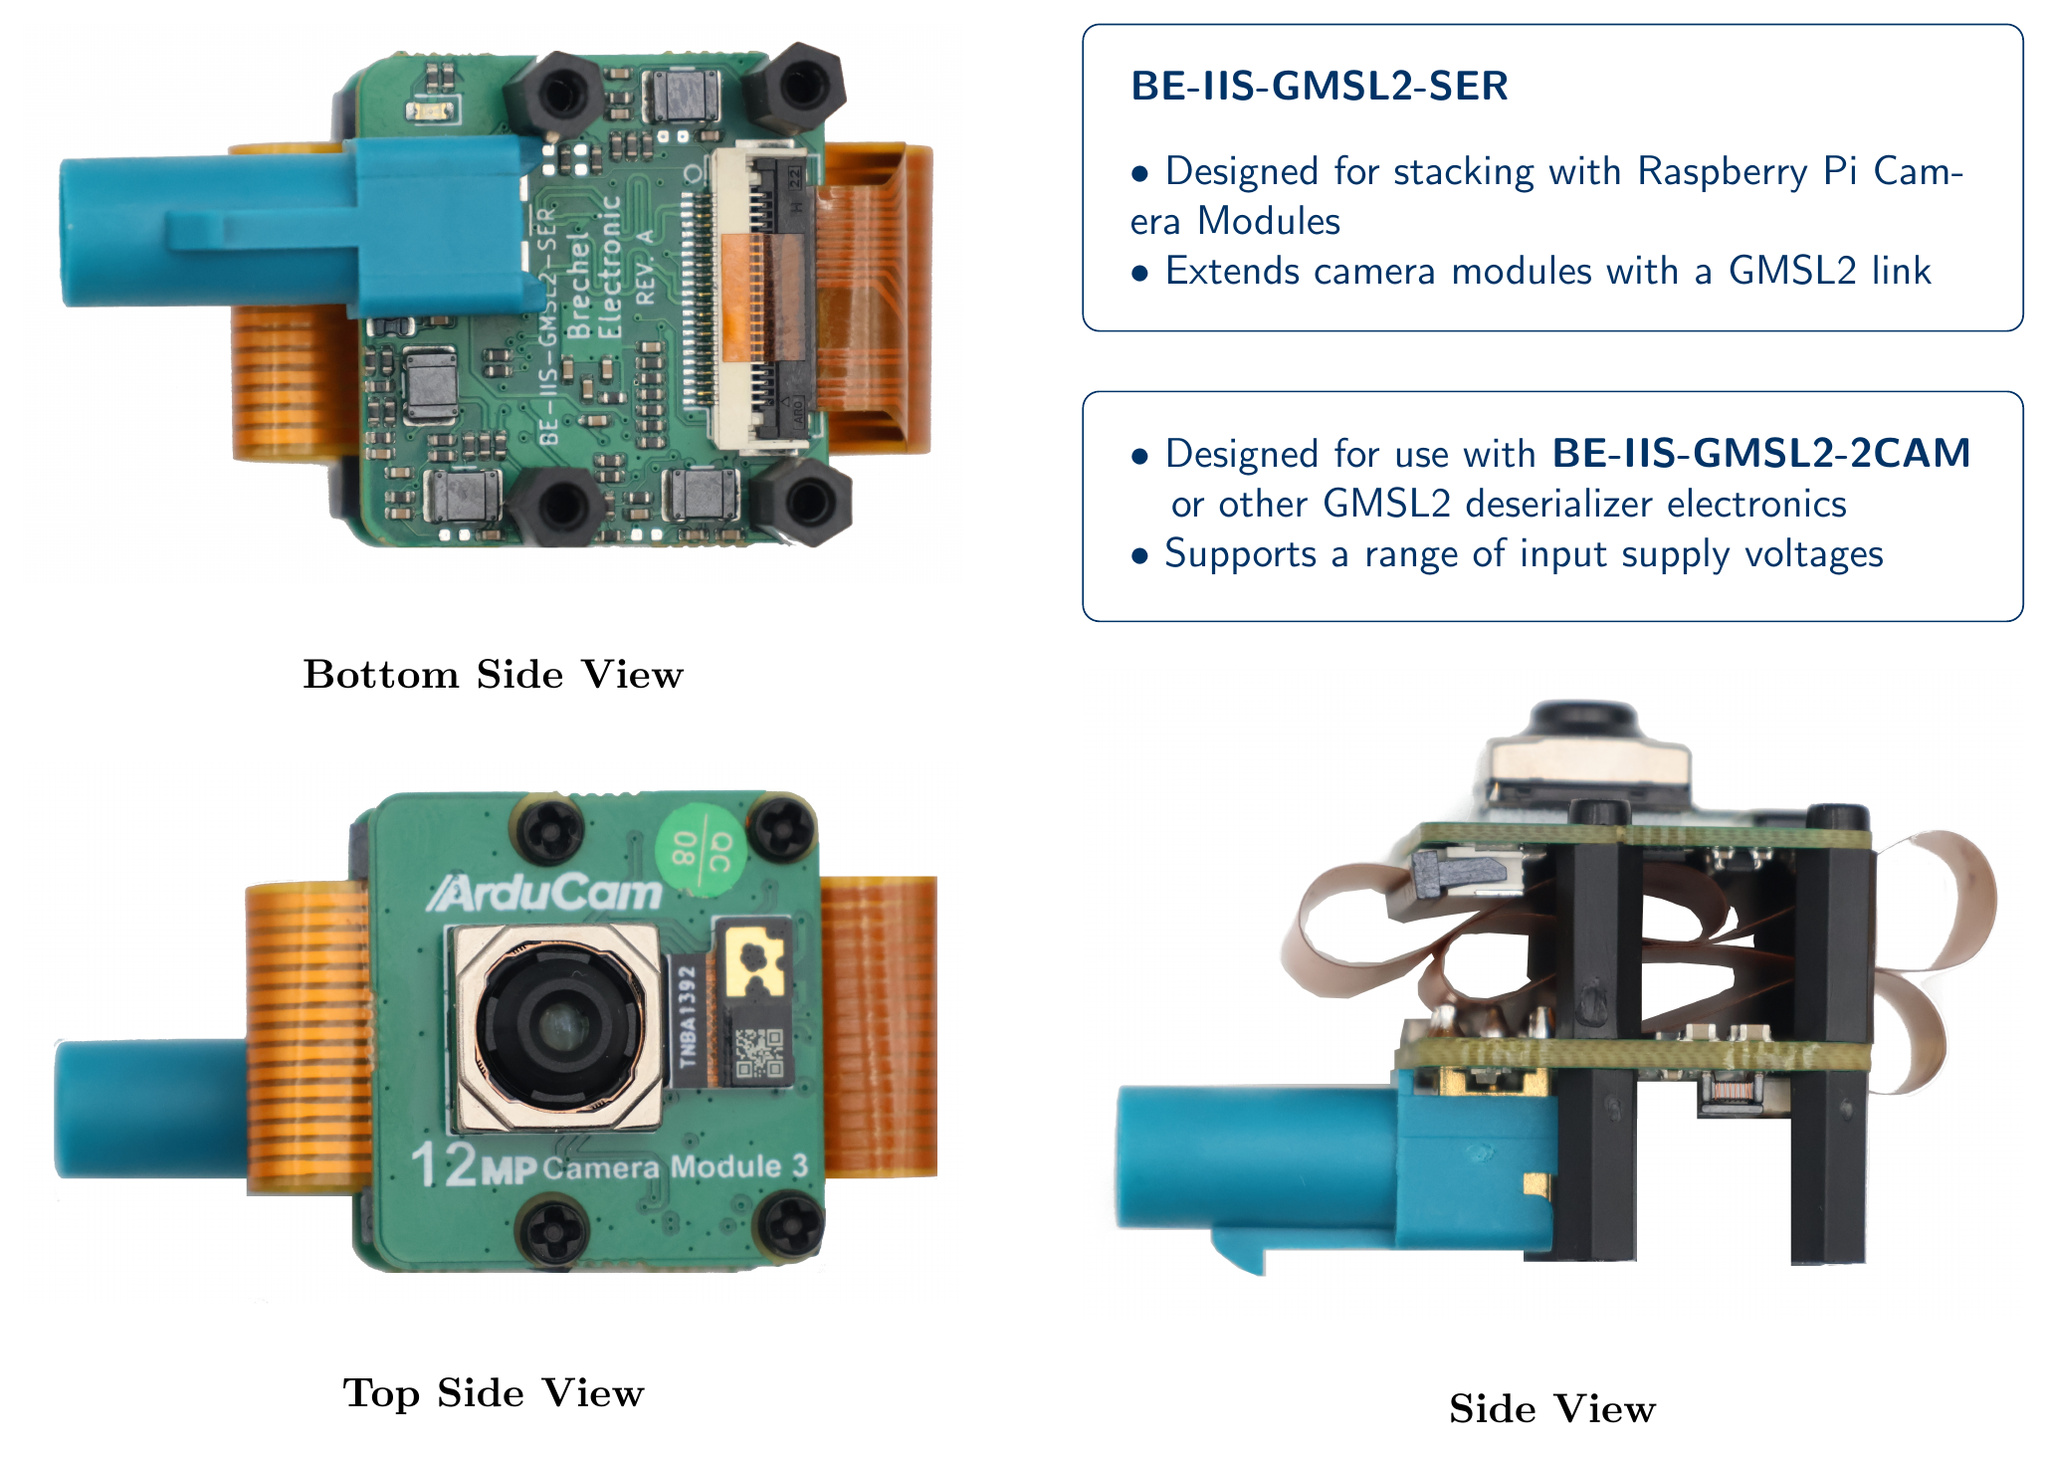
The BE-IIS-GMSL2-2CAM HAT is designed to work with complete, ready-made camera systems as well. The BE-IIS-GMSL-SER board is useful as an open adapter and development platform, but it is not mandatory when a compatible GMSL camera or camera system already provides the required serializer link.
Power over Coax flexibility
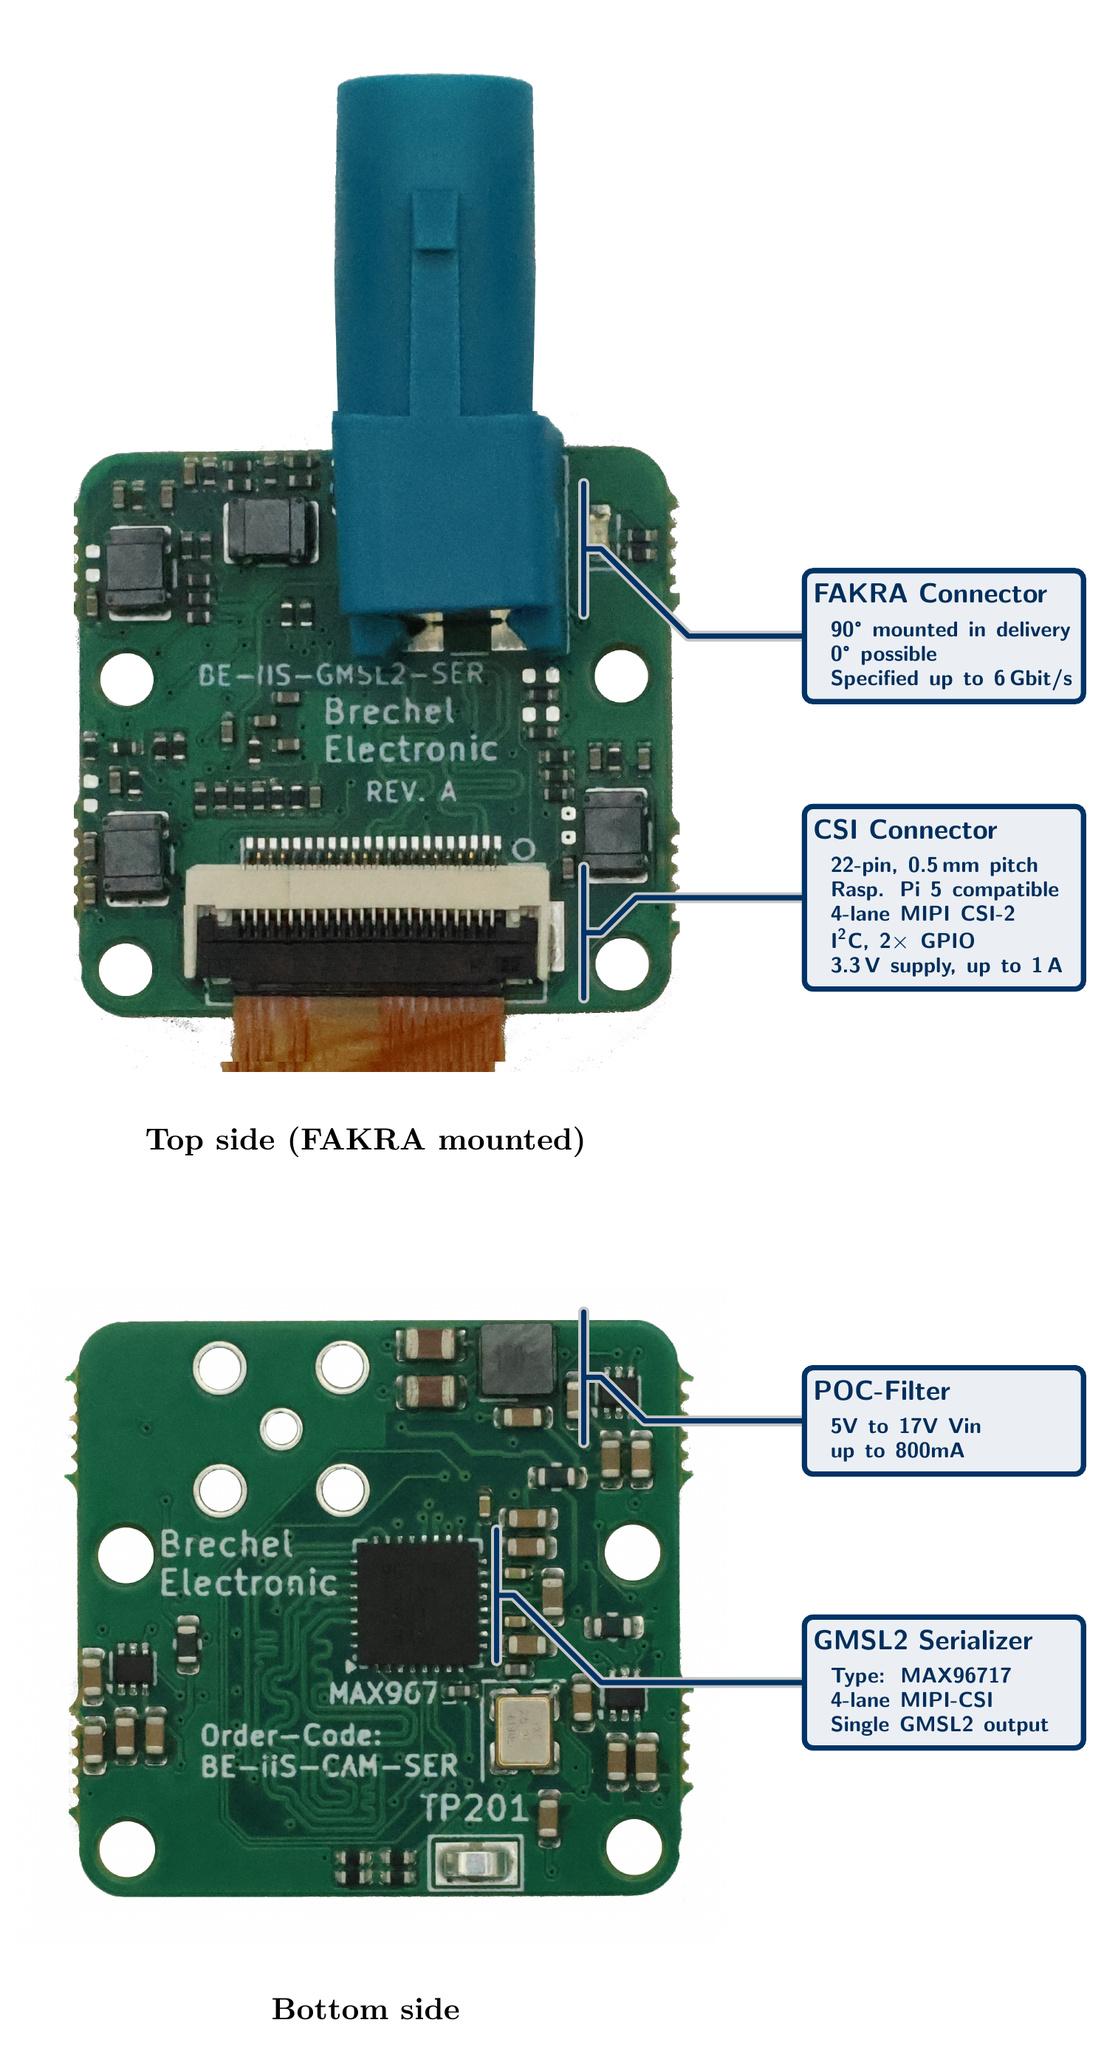
Power over Coax (PoC) can be configured from 5 V to 24 V. This makes the HAT suitable for different remote-camera supply requirements and cable installations.
Hardware architecture
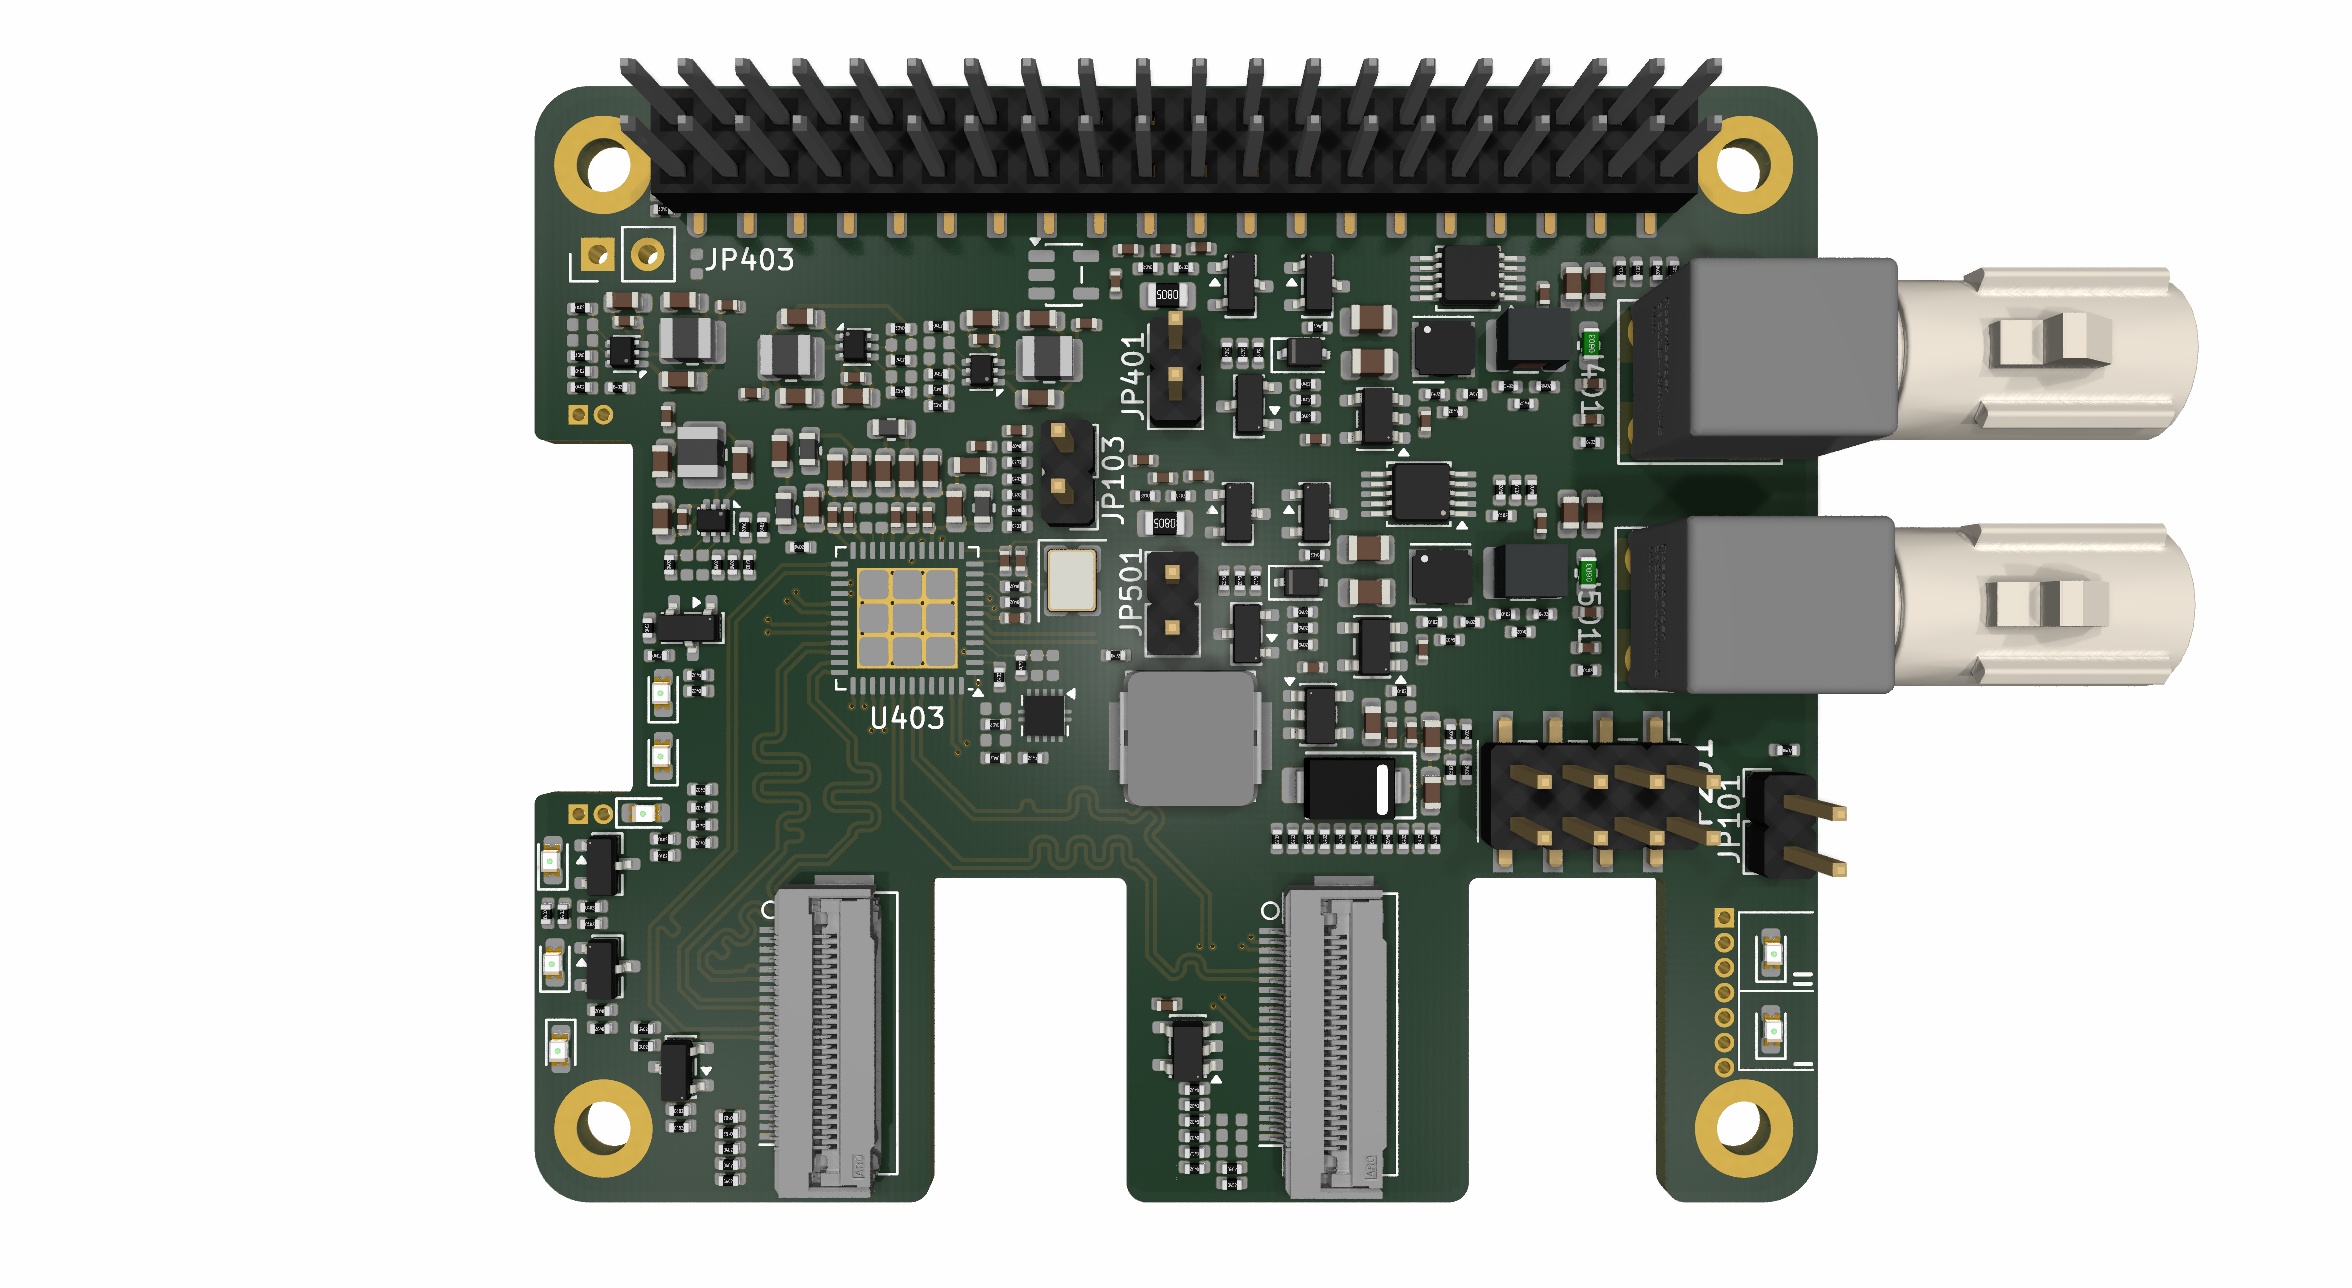
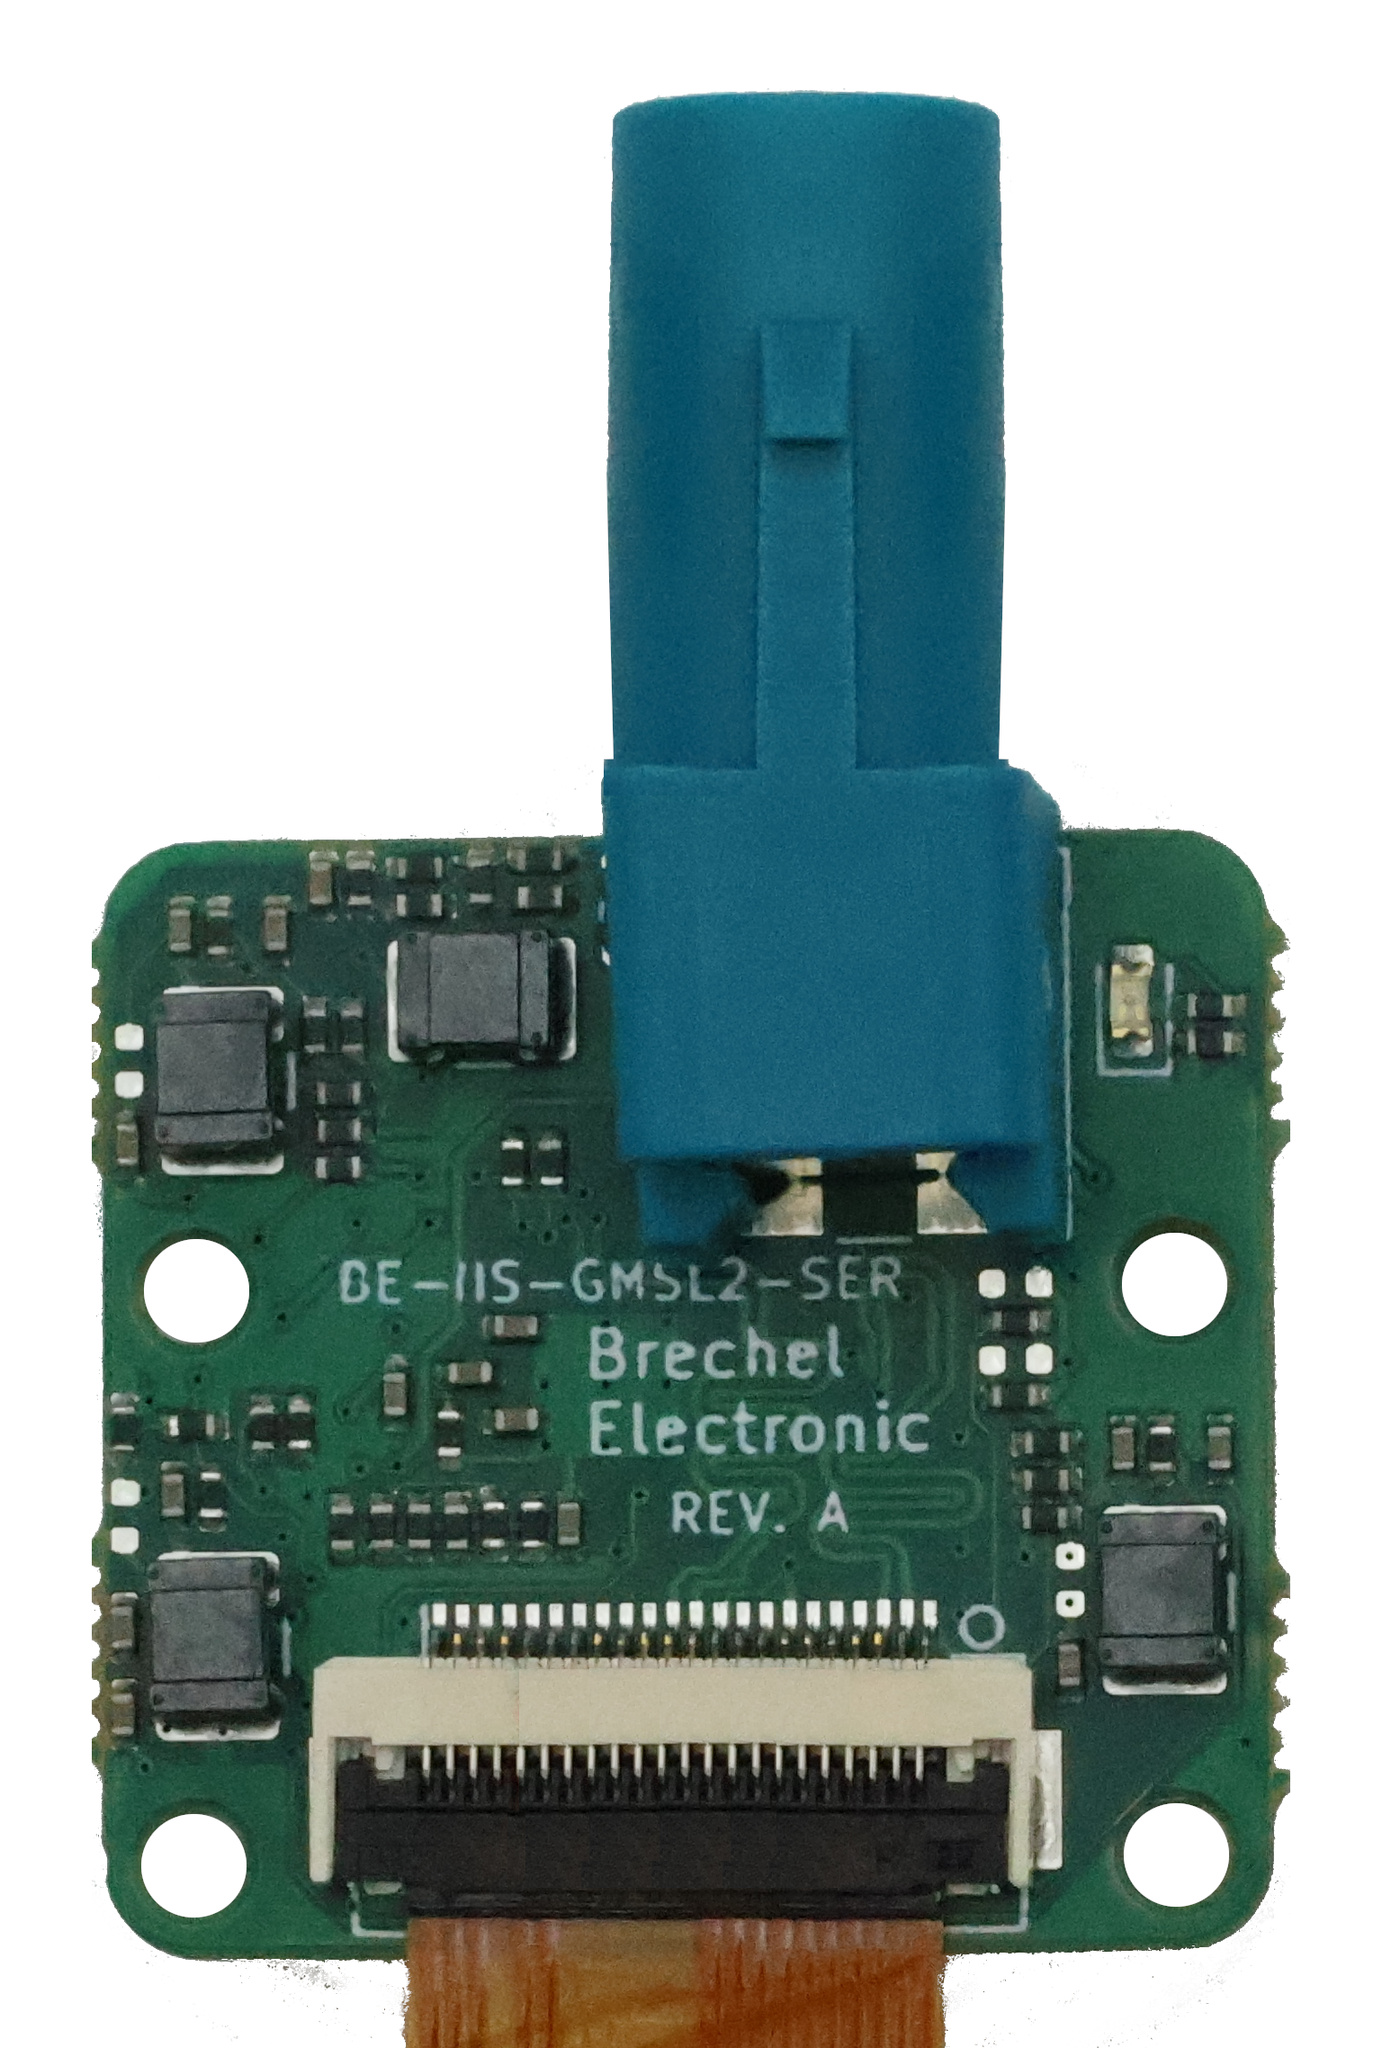
The dual camera HAT uses a GMSL2 deserializer and produces CSI-2 video toward the Raspberry Pi camera interface. The serializer board connects to a compatible camera through its 22-pin FFC/FPC connector and serializes the CSI-2 stream onto a coaxial link.
The same link also carries I²C control, camera reset and camera-enable signals between the host and the remote camera. Power may be supplied through the coaxial cable where the system is designed for Power over Coax.
BE-IIS camera hardware
The system uses the BE-IIS-GMSL2-2CAM host HAT together with one or two BE-IIS-GMSL-SER camera adapter boards. These are the product images for the two hardware elements:
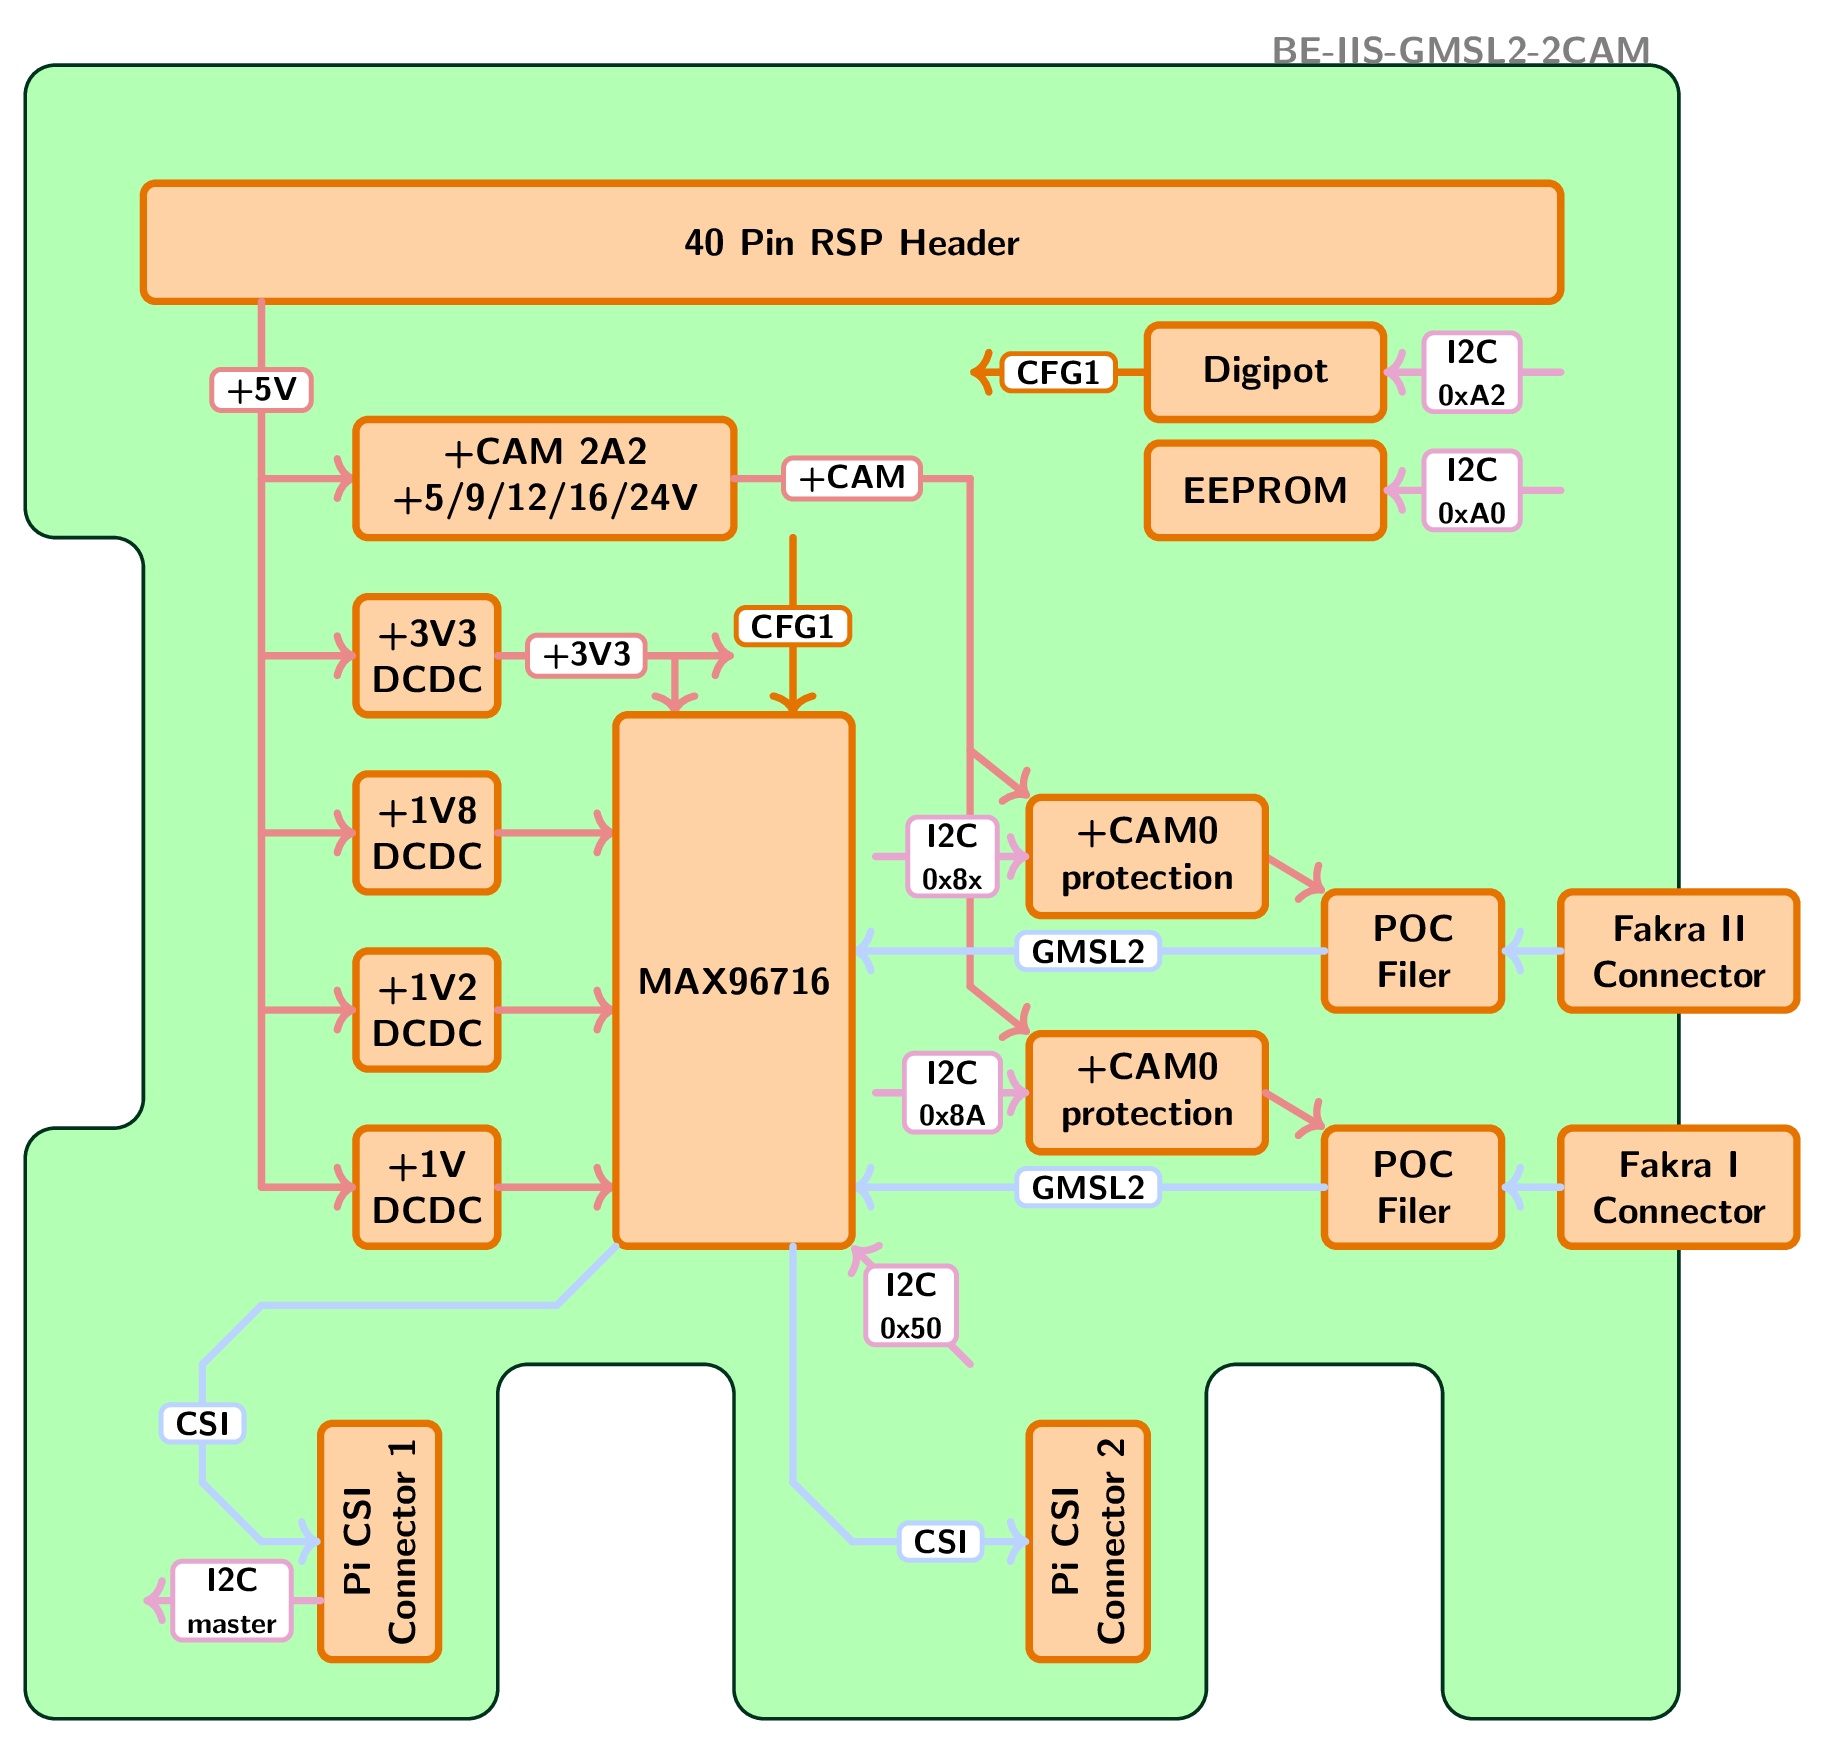
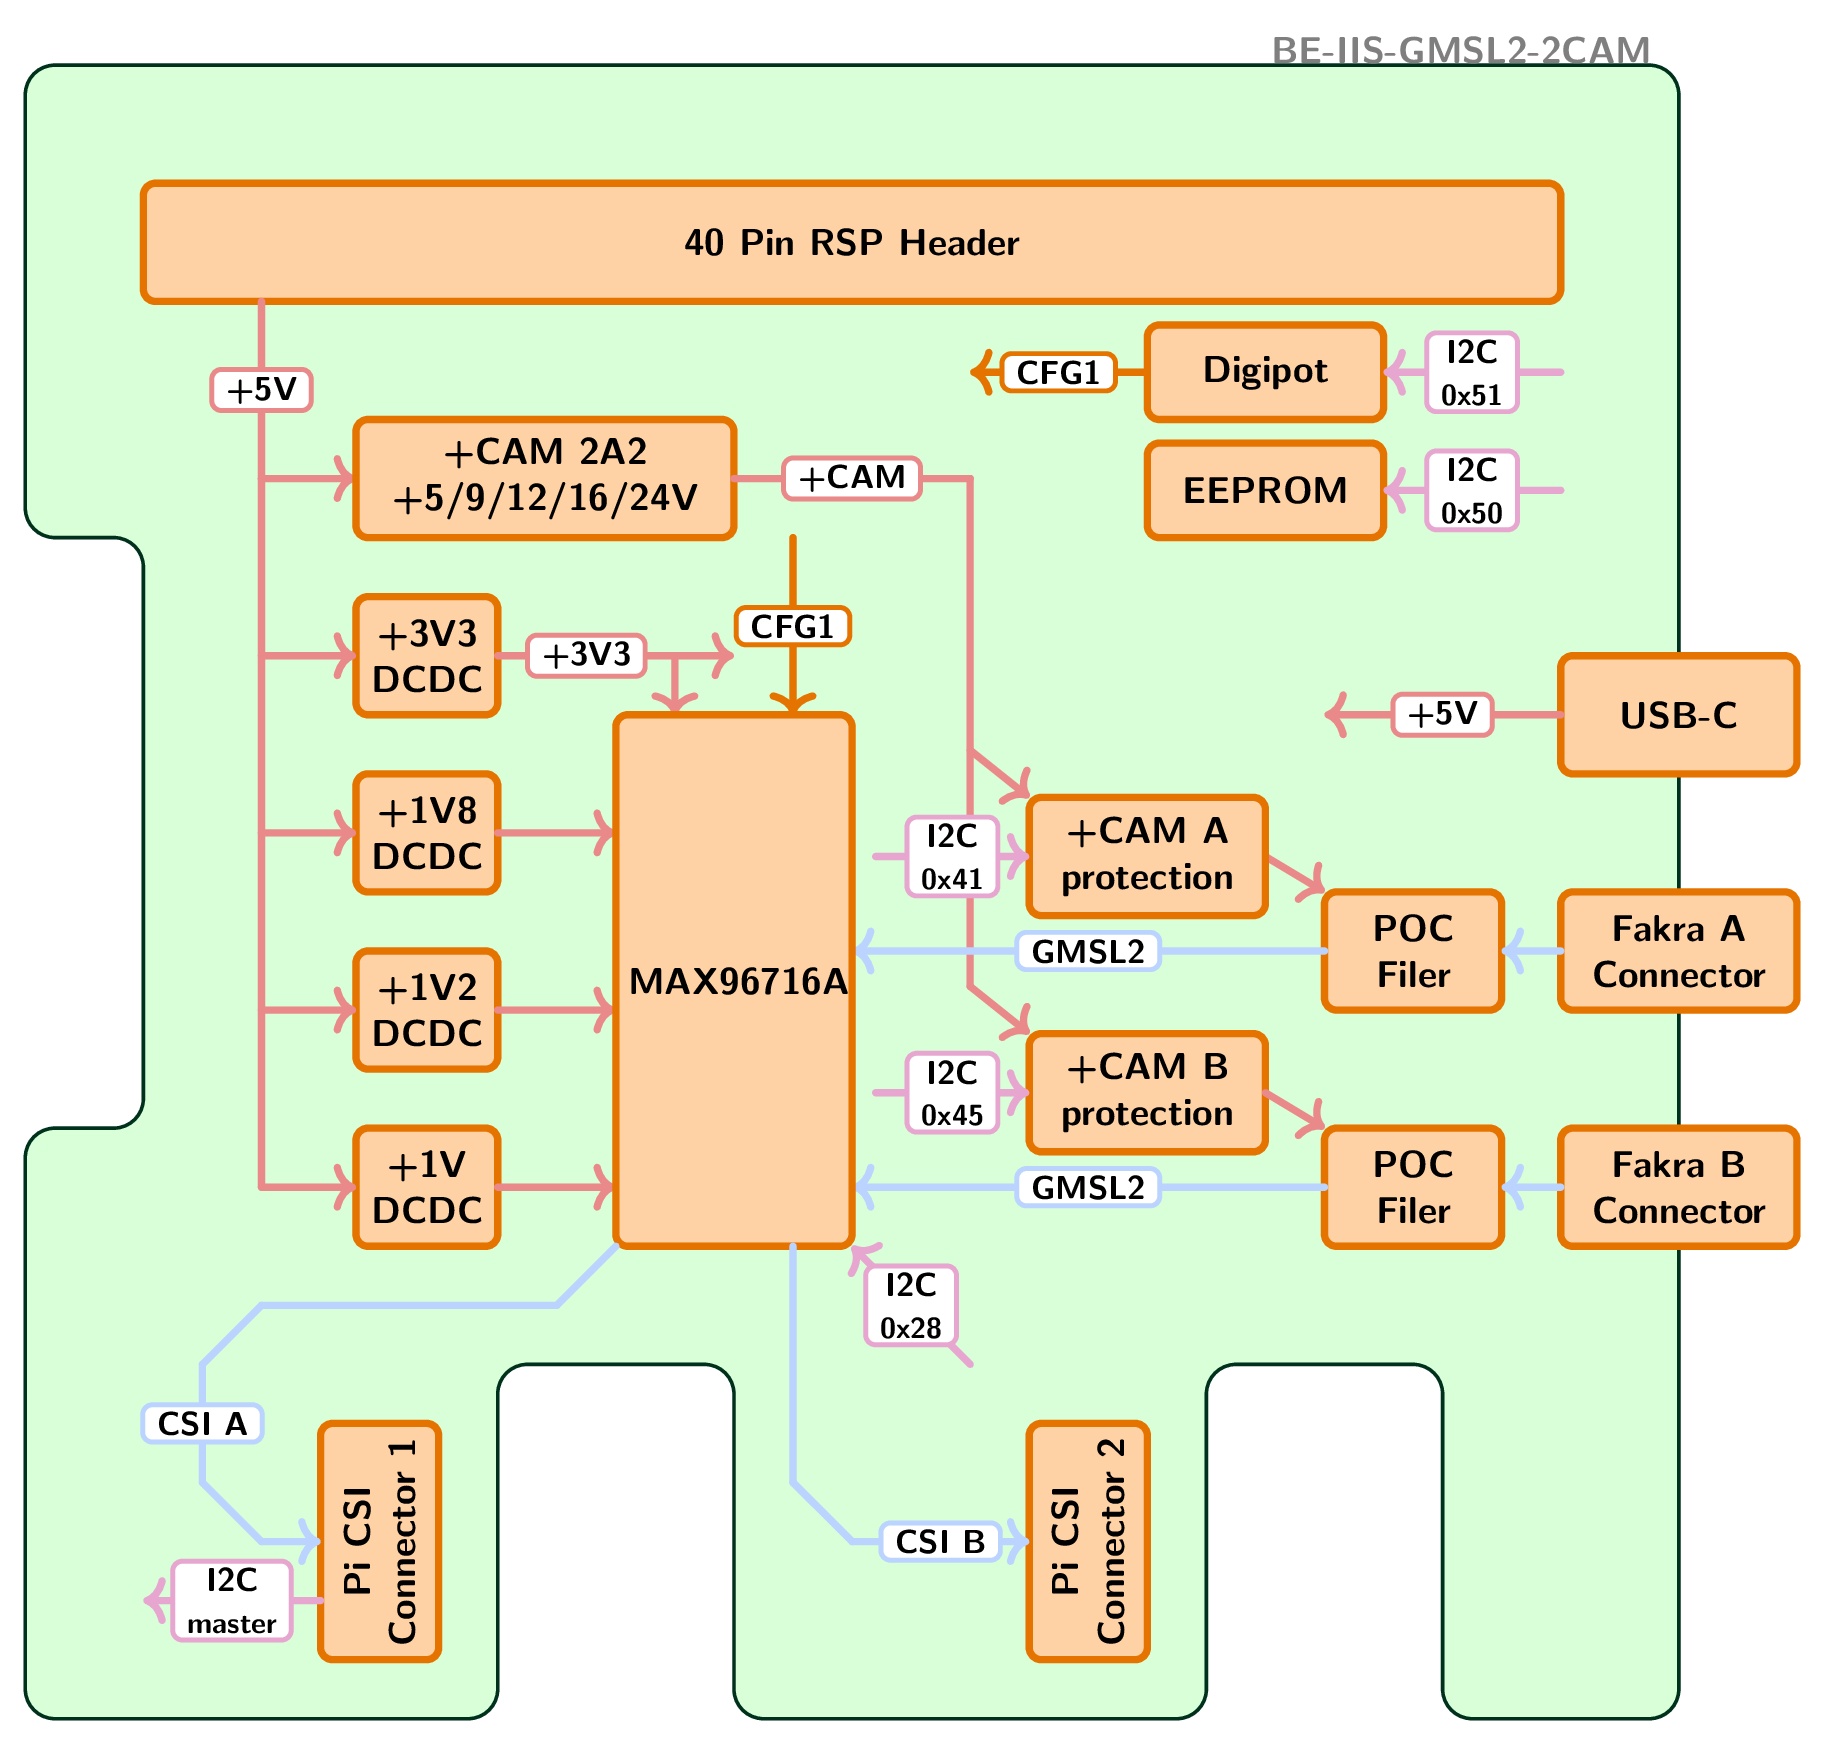
B-sample note: digipot removed
The B sample no longer contains the digipot. The deserializer and serializer settings are available through I²C access, so the digipot no longer had an active function and was removed.
Software flow
The BE-IIS camera installer prepares the Raspberry Pi configuration and configures the GMSL2 links. The normal operating sequence is:
- enable the relevant CSI/I²C configuration
- initialize deserializer and serializer links
- establish I²C aliases for the remote image sensor
- configure the CSI-2 pipeline
- start the camera with the Raspberry Pi camera applications
The current verified dual-camera configuration uses Sony IMX708 sensors in RAW10 mode at 2304 × 1296 pixels, two CSI-2 lanes and 900 Mbit/s per lane. It is intentionally a manual workflow: no systemd service initializes a camera link automatically.
Verified dual-camera workflow
After installing the camera software, prepare the two links and their video pipeline separately:
cd ~/be-iis-cam-installer
make unoverlay
make prepare-a-b
make pipeline-a-b
rpicam-hello --list-cameras
Link A uses the IMX708 alias 0x52 and appears as rpicam camera 1. Link B uses 0x53 and appears as rpicam camera 0. Use make video-0, make video-1 or make video-dual for local preview.
Video preview and streaming to a PC
After the camera links have been prepared, start one local camera preview with the generic target:
make video CAMERA=0
# or
make video CAMERA=1
For a side-by-side HDMI preview of both cameras, use:
make video-dual
To view one camera on a PC over the network, encode the selected rpicam stream as H.264 and send it as RTP/UDP. Replace PC_IP with the IP address of the receiving PC:
rpicam-vid --camera 0 --timeout 0 --inline --codec h264 --width 2304 --height 1296 --framerate 30 --output - | \
  gst-launch-1.0 -q fdsrc ! h264parse ! rtph264pay pt=96 config-interval=1 ! \
  udpsink host=PC_IP port=5000
On the PC, open the stream with GStreamer:
gst-launch-1.0 -v udpsrc port=5000 caps="application/x-rtp,media=video,encoding-name=H264,payload=96,clock-rate=90000" ! \
  rtph264depay ! avdec_h264 ! autovideosink sync=false
Camera 0 is Link B and camera 1 is Link A in the verified dual-camera setup. This is a direct LAN stream; use a suitable network connection and adjust resolution or frame rate if the receiving network cannot carry the selected H.264 stream.
Dual-camera systems
A dual camera arrangement can use two independent GMSL2 links. It is suitable for stereo vision demonstrations, remote industrial cameras and multi-camera evaluation.
Every link must be initialized independently. Camera addresses and aliases must be unambiguous so that the host can address each remote sensor.